
One of my weird cravings is painting murals. It’s a cool feeling to have an enormous ‘canvas’ in front of you and slowly turn it into a wall art. Painting while sitting on the floor or dancing, wiping your hands on the old trousers and not worrying about paint stains is something I regularly crave.
it will be a moose wall art!
Recently I had an opportunity to decorate our apartment for airbnb. As it was our first experience with short term rental, I decided to spice it up. Some would disagree it’s wise to put a lot of effort into a rented apartment, but I just needed an excuse to paint another mural 🙂
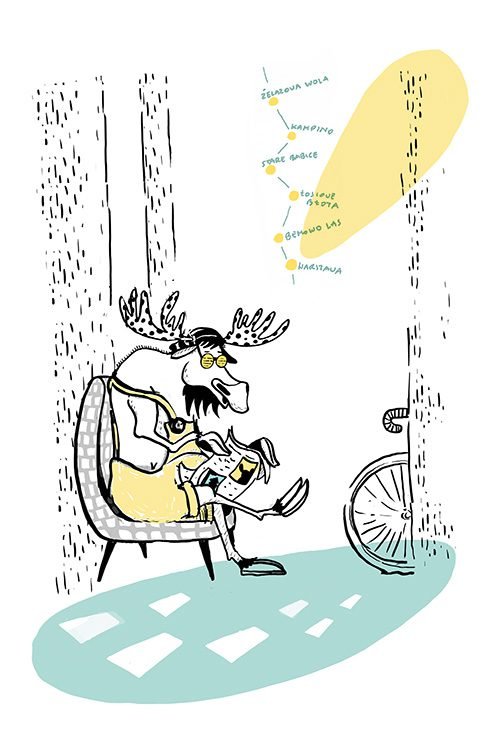
The apartment is next to the woods in the outskirts of Warsaw. I used to live there with my family. Long, long time ago I had a sweet meeting with a moose and that’s how the idea for the mural was born.
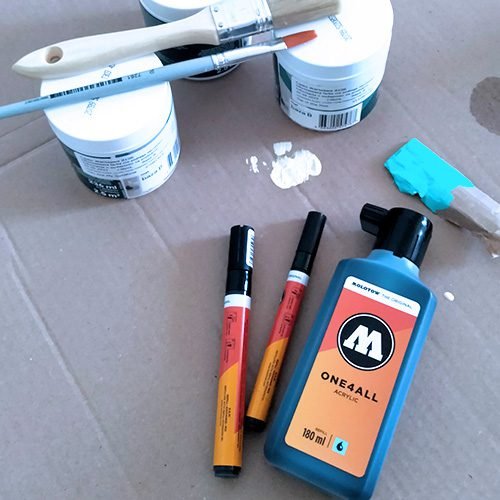
shopping for materials for the mural
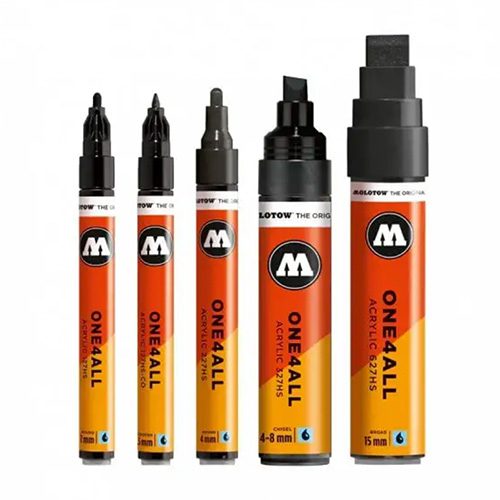
This time I decided to try permanent markers. My reasons for that? I wanted a subtle effect, not too overwhelming plus I wanted to try something new.
My choice were black Molotow markers. These come in different ranges of thickness. I also used two colors of paint for the big blobs of color that were part of my design. For that, I used normal house paints for internal use.
designing a mural
In case of creating a mural with markers, the design needs to be really finished before it goes on the wall. There is no room for mistakes. Sooooo I spent a few hours in my sketchbook and then photoshop to come up with a final idea.
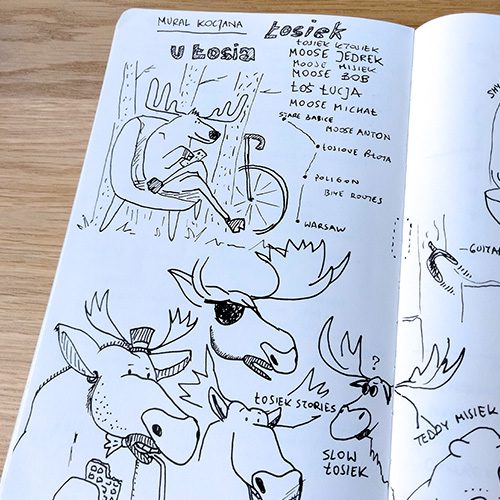
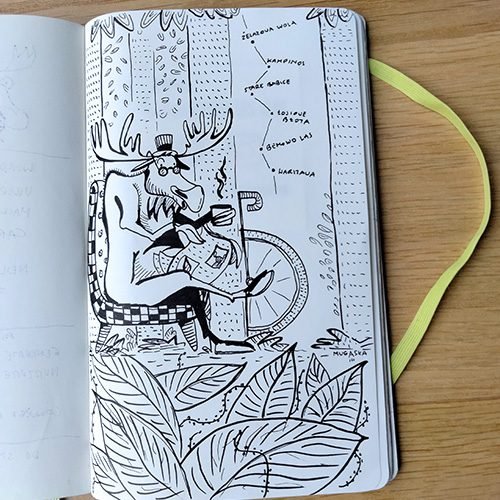
It’s always difficult to decide on the final design. Now writing this blog, I am not really sure, I made the right choice … Perhaps I should draw the leaves at the bottom… However I am still standing by the last moment decision about giving him pants ha ha
throwing the sketch on the wall
Once I finalized the design in photoshop, all I needed to do was to project it on the wall and trace it. I wanted the design to be as tall as the wall. Unfortunately there wasn’t enough space to project it in one piece. For those of you, who don’t use the projector often, I will explain that the bigger projection you want, the further you need to be from the wall. So in order to avoid breaking into my neighbor’s apartment :), I needed to do it in two parts.
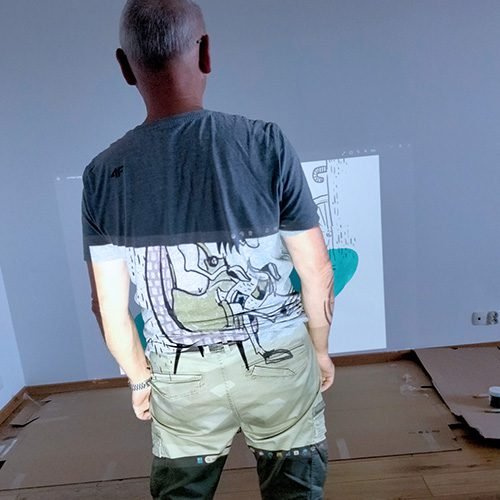
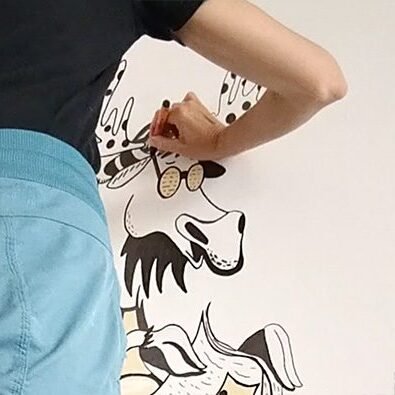
fun with markers and latino music
Between us, I will tell you that I don’t really enjoy tracing the design on the wall. The real fun part starts after! Each of my projects requires an appropriate choice of music. If I were to describe my music taste, I would call myself a rock chic. However I do like some good dance music too and it felt like the right choice here.
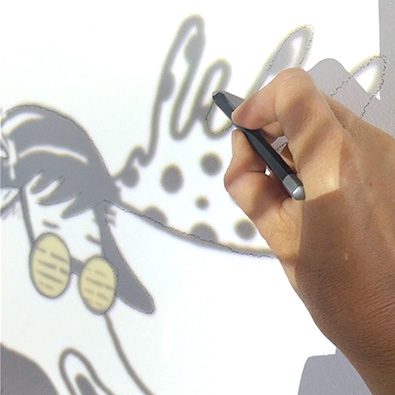
tips for using markers on the wall
My inpatient nature doesn’t like to do much research. Sometimes, I just prefer to test things myself. This way I learned a few important lessons… First of all it’s good to paint on top of the paint that is washable. Yes I managed to smudge the wall in a few places and needed to do some wall cleaning. So here are a few tips, which will save you some time later.
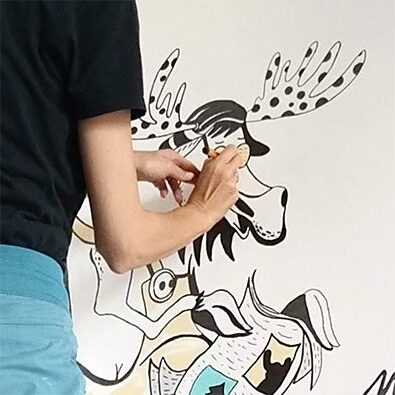
Be careful when buying markers. Molotov has a few tones of black ink. I accidentally had two different… bummer
If you are using color, paint first and then draw with markers on top
If you are right handed, start from the left and move right. This way you will avoid smudging the ink with your hand, as it moves on the wall
Sometimes you have no choice and need to place your hand on the mural. In such cases, use your other hand as a holder. This way, you can put your other hand on the empty areas and your drawing hand on top of it
cup of tea after painting the mural
As much as I am always excited at the start of my projects, I do love the finishing part too. It’s good to take a few minutes to reflect on the result.
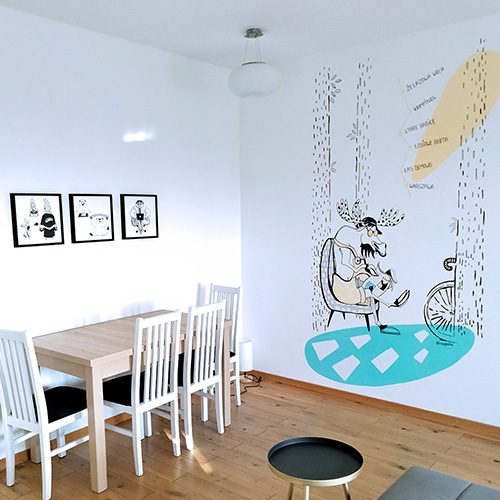
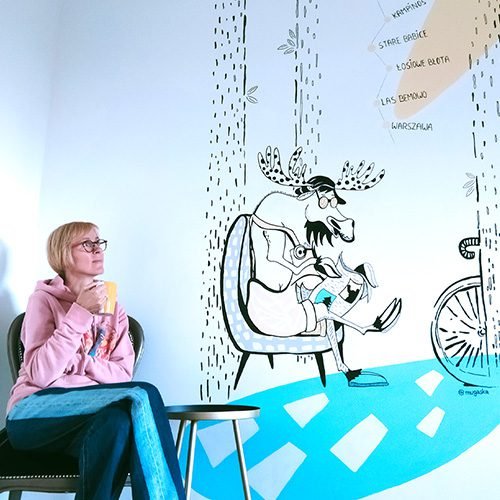
Well… I love it! And his name shall be Tony 🙂
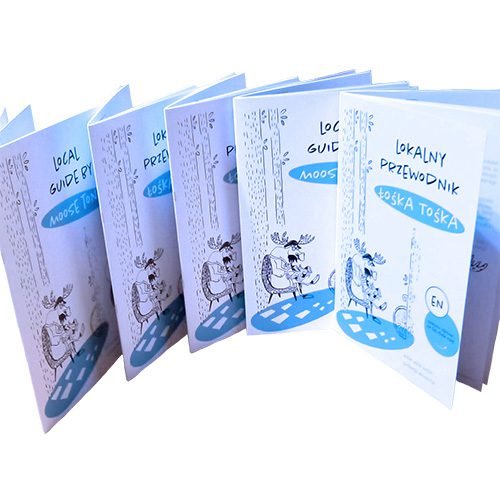
Few weeks after the mural, I created a story about the moose Tony and a local guide for guest of our apartment.